When I upgraded to the iPhone 6 Plus I had this brilliant idea to start from a blank slate on the phone and add apps one by one as I needed them instead of restoring from a backup. In theory this was a good idea but I have since discovered that practically all of my settings and data for the various third-party apps that I had installed would no longer be available to me!
In particular, I had used a list app to keep track of some To Dos, Books, Board Games, Home Improvements, and so on that would be nice to have access to once again. I wanted these lists pretty badly, but not so much that I would risk restoring an old backup onto my new phone. As it turns out, restoring a backup to the iPhone simulator doesn’t really work either.
Without much hope left, I decided to see what I could gleam from a very manual and visual inspection of my most recent backup. To my great relief, this effort ended up panning out for me. In case anyone may want to use some of the same tricks, I’ve documented my approach below.
Before We Begin
There are a couple of things that I should point out before I begin.
The data I was looking for was textual in nature and I was able to remember one or two exact phrases that would help me locate the data. This hack involves searching through many gigabytes of files so it will really help if you can remember something fairly unique about what you are searching for.
I used Terminal on Mac OS X to run some bash commands to help me along. You don’t absolutely need to be familiar with bash to pull this hack off but it would help. Also, Windows does not come with bash by default so if you are running Windows you will need to install something equivalent such as CygWin.
You will need a backup saved to your computer. As far as I know, these instructions don’t work for an iCloud-only backup.
Step 1 - Locate the Backup
The first thing I had to figure out was where on my computer my iPhone backup was located. I found this article that pointed me in the right direction.
On Mac OS X the backups are kept here:
~/Library/Application Support/MobileSync/Backup/
On Windows 7 the backups are kept here:
C:\Users\user\AppData\Roaming\Apple Computer\MobileSync\Backup
This directory will contain one or more other directories with cryptic names. Choose the most recently modified directory for you search. From a bash terminal (launch Terminal in Mac OS X or CygWin in Windows), you can use ls to get this info:
$ cd ~/Library/Application\ Support/MobileSync/Backup/
$ ls -l
total 0
drwxr-xr-x  1789 user  staff   60826 Dec  7  2011 cc75651774e7d33aa0b2c41daddd5e71c434911a
drwxr-xr-x  6251 user  staff  212534 Sep 14 12:22 ce821a918c7df7e1141b13e1a27951f0fe1c0609
In my case I chose the backup “ce821a918c7df7e1141b13e1a27951f0fe1c0609” for my search and then changed to that directory in my open terminal:
$ cd ce821a918c7df7e1141b13e1a27951f0fe1c0609/Step 2 - Locate Likely Candidates
The backup will likely contain hundreds of files that are as cryptically named as the backup itself. These files are also binary with little bits of text littered throughout, so searching through these files would be very difficult to do one at a time. This is where the hack starts to get technical.
Use the following command to search through all of the files located in the backup for a string that you suspect would be included within the data you want to recover. In my case I was looking for a book list and searched for an author I thought might be in the list: Brandon Sanderson.
$ find . -type f | xargs fgrep -i 'brandon sanderson'
Binary file ./176ad246fb5b1db1276b1a593b405f77aeef7454 matches
Binary file ./3d0d7e5fb2ce288813306e4d4636395e047a3d28 matches
Binary file ./3f911eaba3ed2d1657bc98cc5386ef2b998f7e0e matches
Binary file ./43dd6c5ec8890e6d431ef1e1f94b055c8a3da4ff matches
Binary file ./972be36ca964b5a22c5bc748202886d46e4fa963 matches
Binary file ./c079df01654bbab0b8ae4c0e757177d824981c09 matches
The search may take several minutes to finish. While it’s running though, you should start getting a list of files that contain the search string that you supplied. Once the search completes, you will hopefully have a small handful of files to inspect to find the right one.
Step 3 - Find the One True File
The next part is tedious: inspect each resulting file by hand. I hope you only had a few files match! If not, perhaps you should try a different search string.
Open each file in your favorite text editor (if you have a text editor that handles binary files really well then choose that one). I just chose vi because I was already at the command prompt.
For each file, search for the string again. You may have to mix up the capitalization if you are doing an exact match, but when you find the string then you will need to look at the surrounding text to see if it general fits with the other types of data that you are looking for. In my case since I was trying to find a book list I looked for other authors and book titles.
If the surrounding content doesn’t fit what you’re looking for then move on to the next file. When you do find the right file then go back to the top of the file and look at the first handful of bytes. If you see the string “SQLite format 3” then you’re even more likely to be on the right track because SQLite is a common way to store application data on iPhones.
The resulting file is a database that will contain a lot of browsable data as long as we have a program that can understand the file format. Fortunately for us, there is a freely available tool named SQLite Browser.
Step 4 - Install and Launch SQLite Browser
You can download the latest version of SQLite Browser from their GitHub release page.
If you’re running Mac OS X you may have to jump a small hurdle to run the app. When I first tried to run the program I was told that my security preferences do not permit the application to be launched. To get around this problem i sent to Settings > Security & Privacy and clicked the “Open Anyway”.
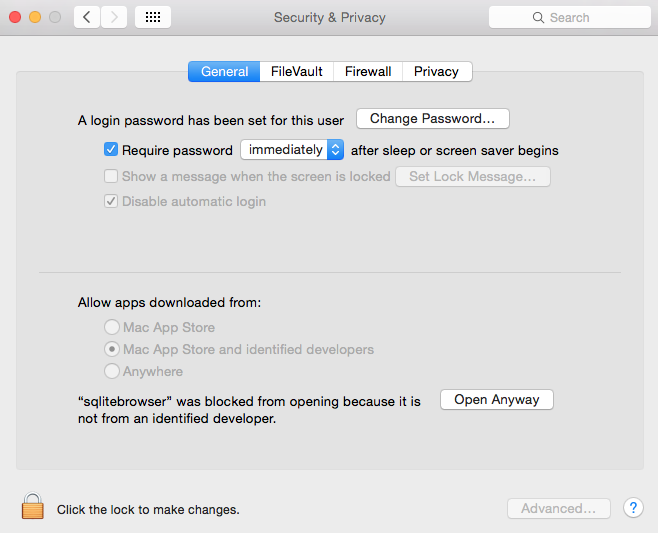 Open Anyway
Step 5 - Open the Database
Once SQLite Browser is running, open the file that contains the data you want to inspect. This is pretty straight forward on Windows but on Mac OS X the Library directory is hidden by default so when you are prompted to select a file to open you will need to press Command+Shift+G and type in “/Users/user/Library” before you can actually drill down and find the file you are looking for.
Another useful tip for opening the file once you navigate to the backup directory that contains all of the cryptic file names is that you can just start typing the name of the file and Finder or Explorer will jump you to the first file that matches the text you have typed.
When the file opens, you will see something like this:
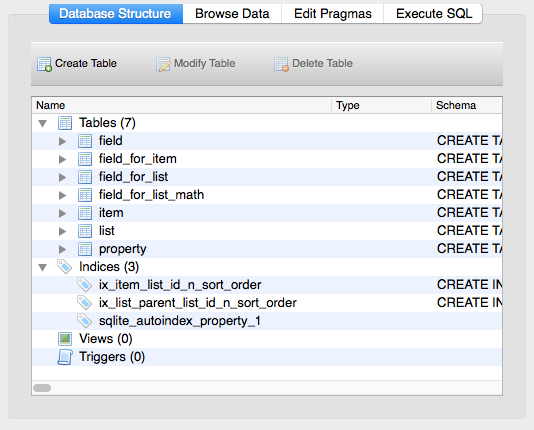 DB Structure
Step 6 - Explore the Structure
Upon opening the database file you will be presented with a list of tables. These tables contain the data that you are looking for but it may not be obvious which tables are the right ones. You will have to explore the structure to figure out how the tables relate to each other but generally the table names will make some sort of sense and help you know where to start.
In my case I was looking at a database for a list manager. There happened to be a table named “list” which is where I started my search.
When you find a table that you want to inspect, simply click the “Browse Data” tab and choose the appropriate table from the dropdown list. In my case the “list” table looked like this:
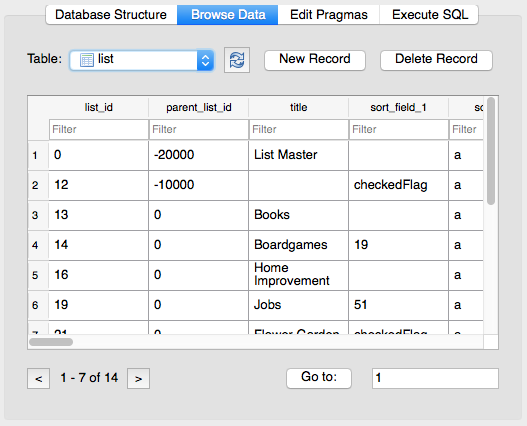 List Data
The list I was looking for is right there! However, I wanted to get the titles and authors of the books in the list so I wasn’t quite done yet.
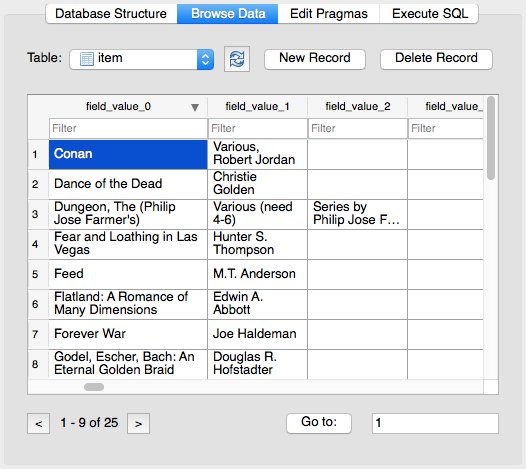
Keeping in mind that SQLite is a relational database, I took note of the value “13” in the “list_id” cell for the “Books” list. I then picked a different table, looking for a similarly titled column. When I opened the “item” table I found what I was looking for: the values that make up each of the lists. I typed the value “13” into the “list_id” Filter box and was presented with all of the items contained in list 13.
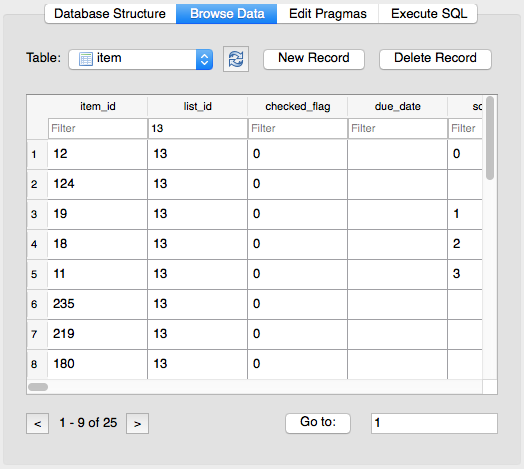 Filter Data
Scrolling to the right a little bit confirmed that I was in the right spot. Behold, my book list!
 Found Data
Step 7 - Export the Table
Being able to see my lists felt pretty damn awesome. The next thing I wanted to do was copy that data and put it somewhere useful, such as in a spreadsheet or text file. Unfortunately, at the time of this writing, SQLite Browser does not support Copy/Paste operations. :(
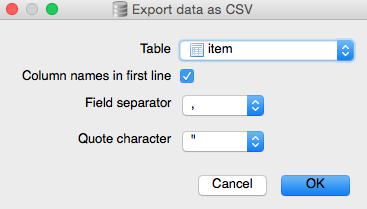
Fortunately, there is an export option. If you select File > Export > Table as CSV File you will be presented with a window that lets you choose a table to export.
 Export Table
Choose the appropriate table to export (“item” in my case) and click OK. Type the name of the file and save. You now have a file you can open in Numbers or Excel and Copy/Paste and manipulate to your heart’s content!