Today I spent a few hours learning how to create a simple graphic that looks like it was made from little pieces of construction paper.
I’m happy enough with the results that I thought I should share.
Download These First
Before we get started, there are few things that need to be downloaded and installed. Don’t worry, all of the below are free, even for commercial use!
Go ahead and install Inkscape and Gimp.
To install the patterns, we need to figure out where they need to be placed on your filesystem. Start Gimp and open up its Preferences. Navigate to Folders and select Patterns to see a list of directories or folders that Gimp will look in to find patterns.
Extract the downloaded paper patterns to one of the locations listed or add a new location and point it to wherever the patterns are located.
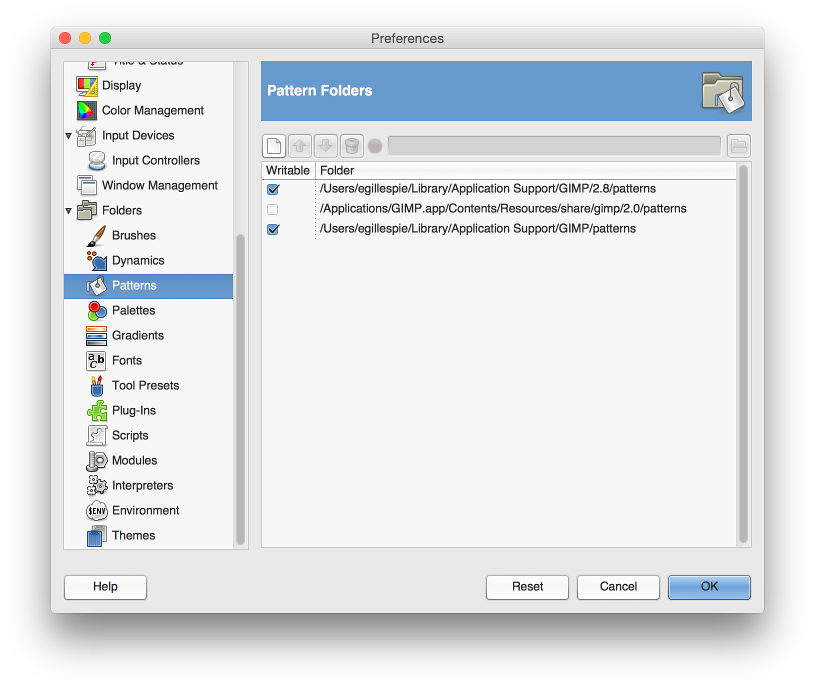
I’m using Mac OS X so I copied all of the .png files into ~/Library/Application Support/Gimp/patterns and made sure that folder was listed in the pattern folders.
Restart Gimp to pick up the new patterns. We’ll be using them in a little bit.
Create a Rocket SVG
Now that we have all of the necessary tools installed, let’s get started. The first thing we need to do is create a rocket.

Start Inkscape and open the Cartoon Rocketship with Inkscape tutorial. This is where I started to learn how to use Inkscape. The tool is a little intimidating and awkward to use on a Mac but if you have a little bit of experience using other graphics programs you should be able to find your way around.
The tutorial assumes some basic knowledge of Inkscape, which I did not have. But I know how to use Ctrl+Z to undo and was able to click around to find what I needed. The toughest part for me was figuring out how to change the fill color and opacity in Step 6. Hint: click  to make the Fill and Stroke panel appear.
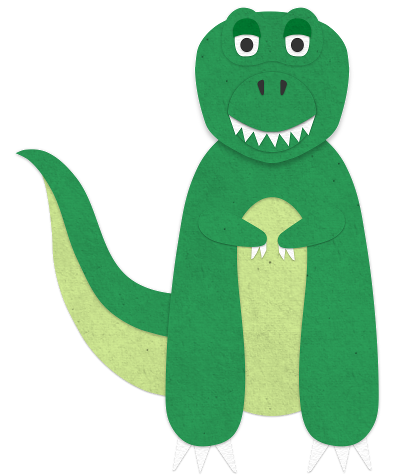
Follow the tutorial through Step 8. I didn’t do the whole tutorial because some of the highlighting effects seemed a little overkill for what someone might realistically create by cutting out pieces of construction paper. The image above and right is what I came up with.
When you’re done, save the rocket as an SVG.
Make It Paper
At this point we’re all done with Inkscape. Time to open up Gimp and give the rocket a paper look.
When you open the SVG in Gimp you will be presented with the following window:
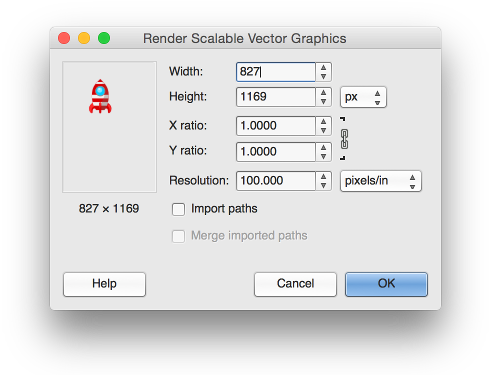
The only change I made here was on the Resolution. 100 pixels/inch should look nice on most displays so I used that.
When the rocket appears in Gimp, you’ll notice that the canvas size is probably way larger than the image. Easy fix: select Image > Autocrop Image.
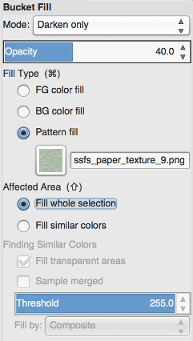
The paper effect is actually crazy-easy in Gimp. Do all of the following:
- Choose the Bucket Fill tool.
- In the Tool Options use the following values: a. Mode: Darken Only b. Opacity: 40% c. Fill Type: Pattern fill d. Pattern: ssfs_paper_texture_9.png (the green paper texture) e. Affected Area: Fill whole selection
- Click in the image somewhere.
Voilà, paper rocket!!
Export your work into a PNG and show all of your friends!